Custom 3D-Printed Electrical Panel
The Nor'Sea 27 came with a fuse-based electrical panel that predated most of the electronics I wanted aboard. Over time, circuits had been added with two breakout sub-panels scattered around the cabin. The result was functional, but scattered: breakers and fuses in three different locations, with no unified view of what was on or off. I designed and printed a single panel to consolidate everything.
The Original Setup
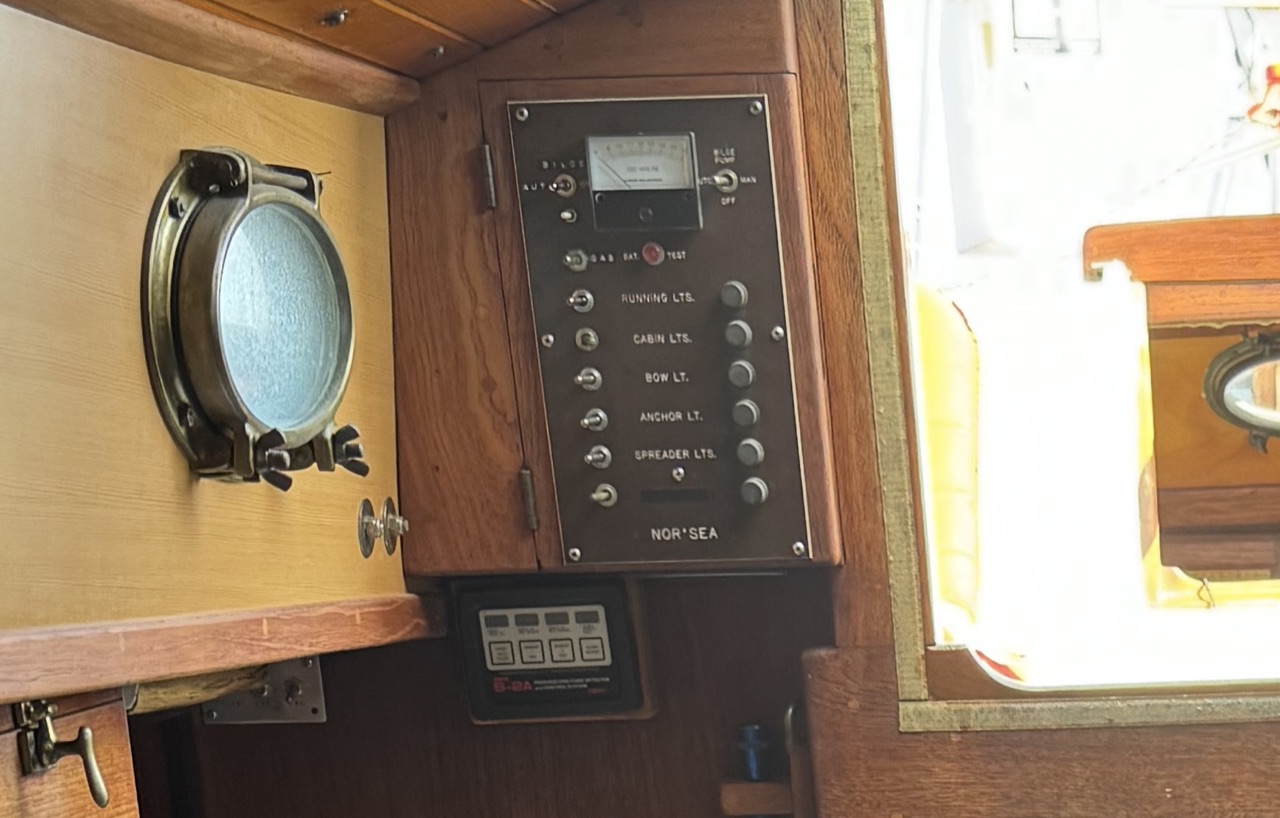
The original NOR'SEA panel: nine circuits, toggle switches, and a separate breakout panel below for the additions that didn't fit.
The old fuse panel didn't have enough positions for the electronics I wanted to add, so over time two breakout sub-panels appeared elsewhere in the cabin. Tracking down a tripped fuse or toggling a circuit meant knowing which of three panels it was on. I wanted everything in one place: a clean, labeled panel that fit the existing cabinet opening near the companionway.
Designing the Panel
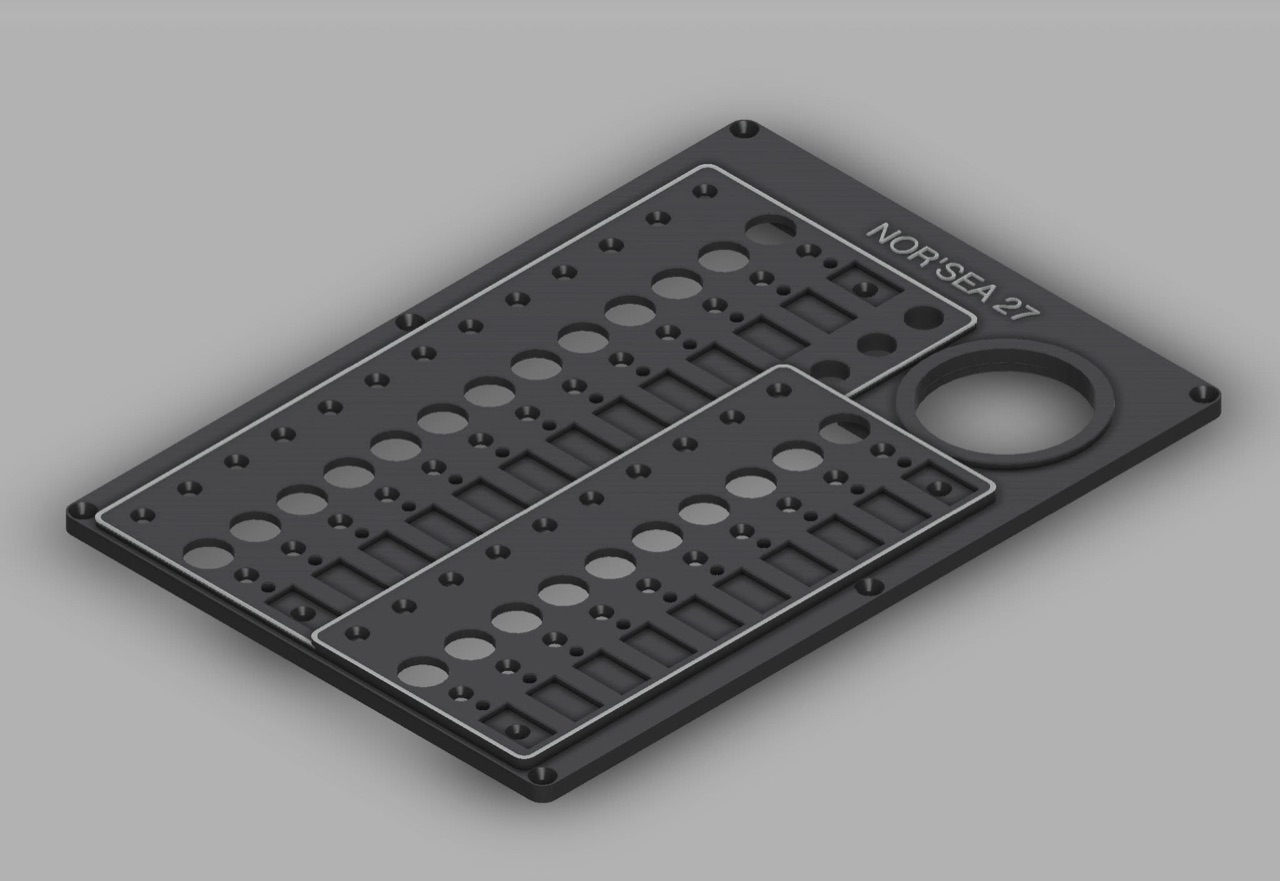
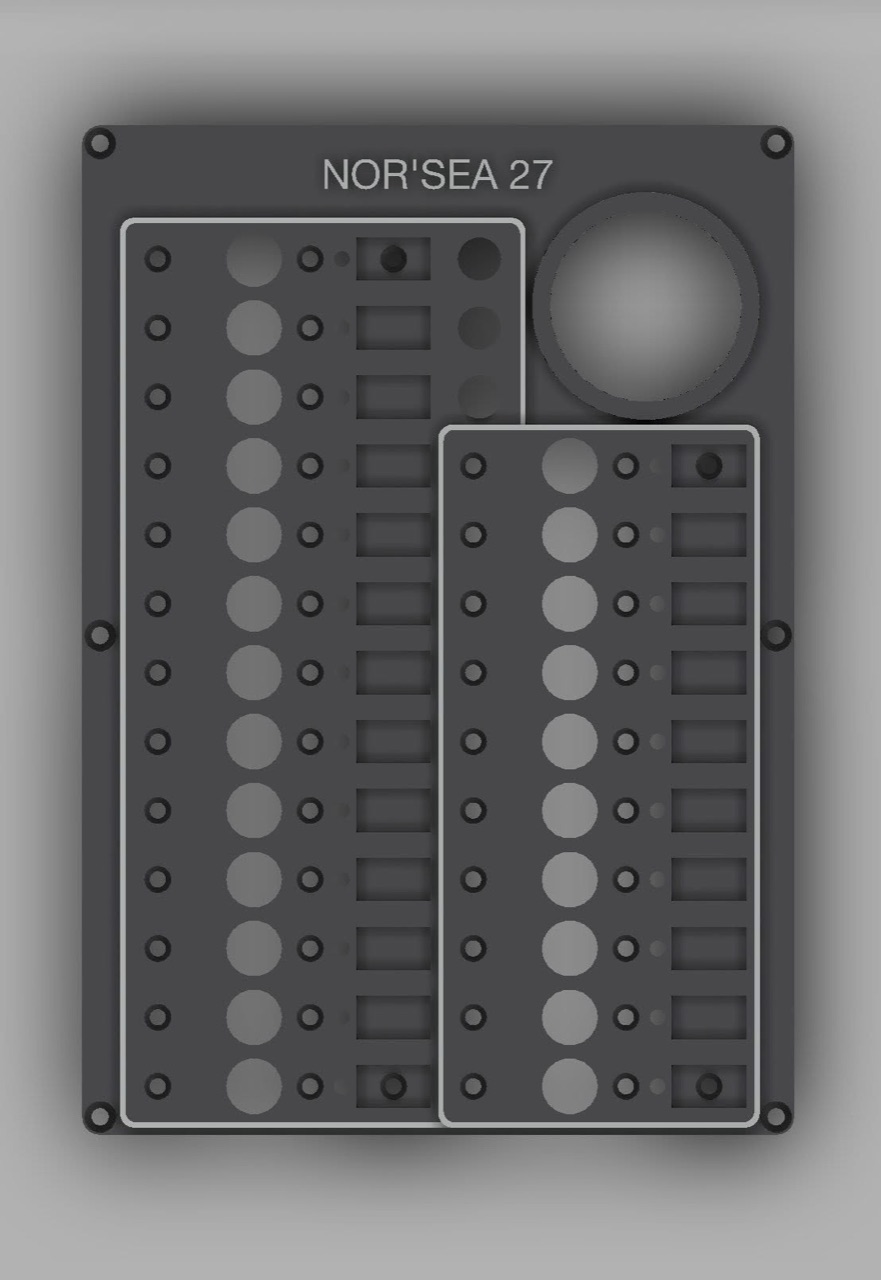
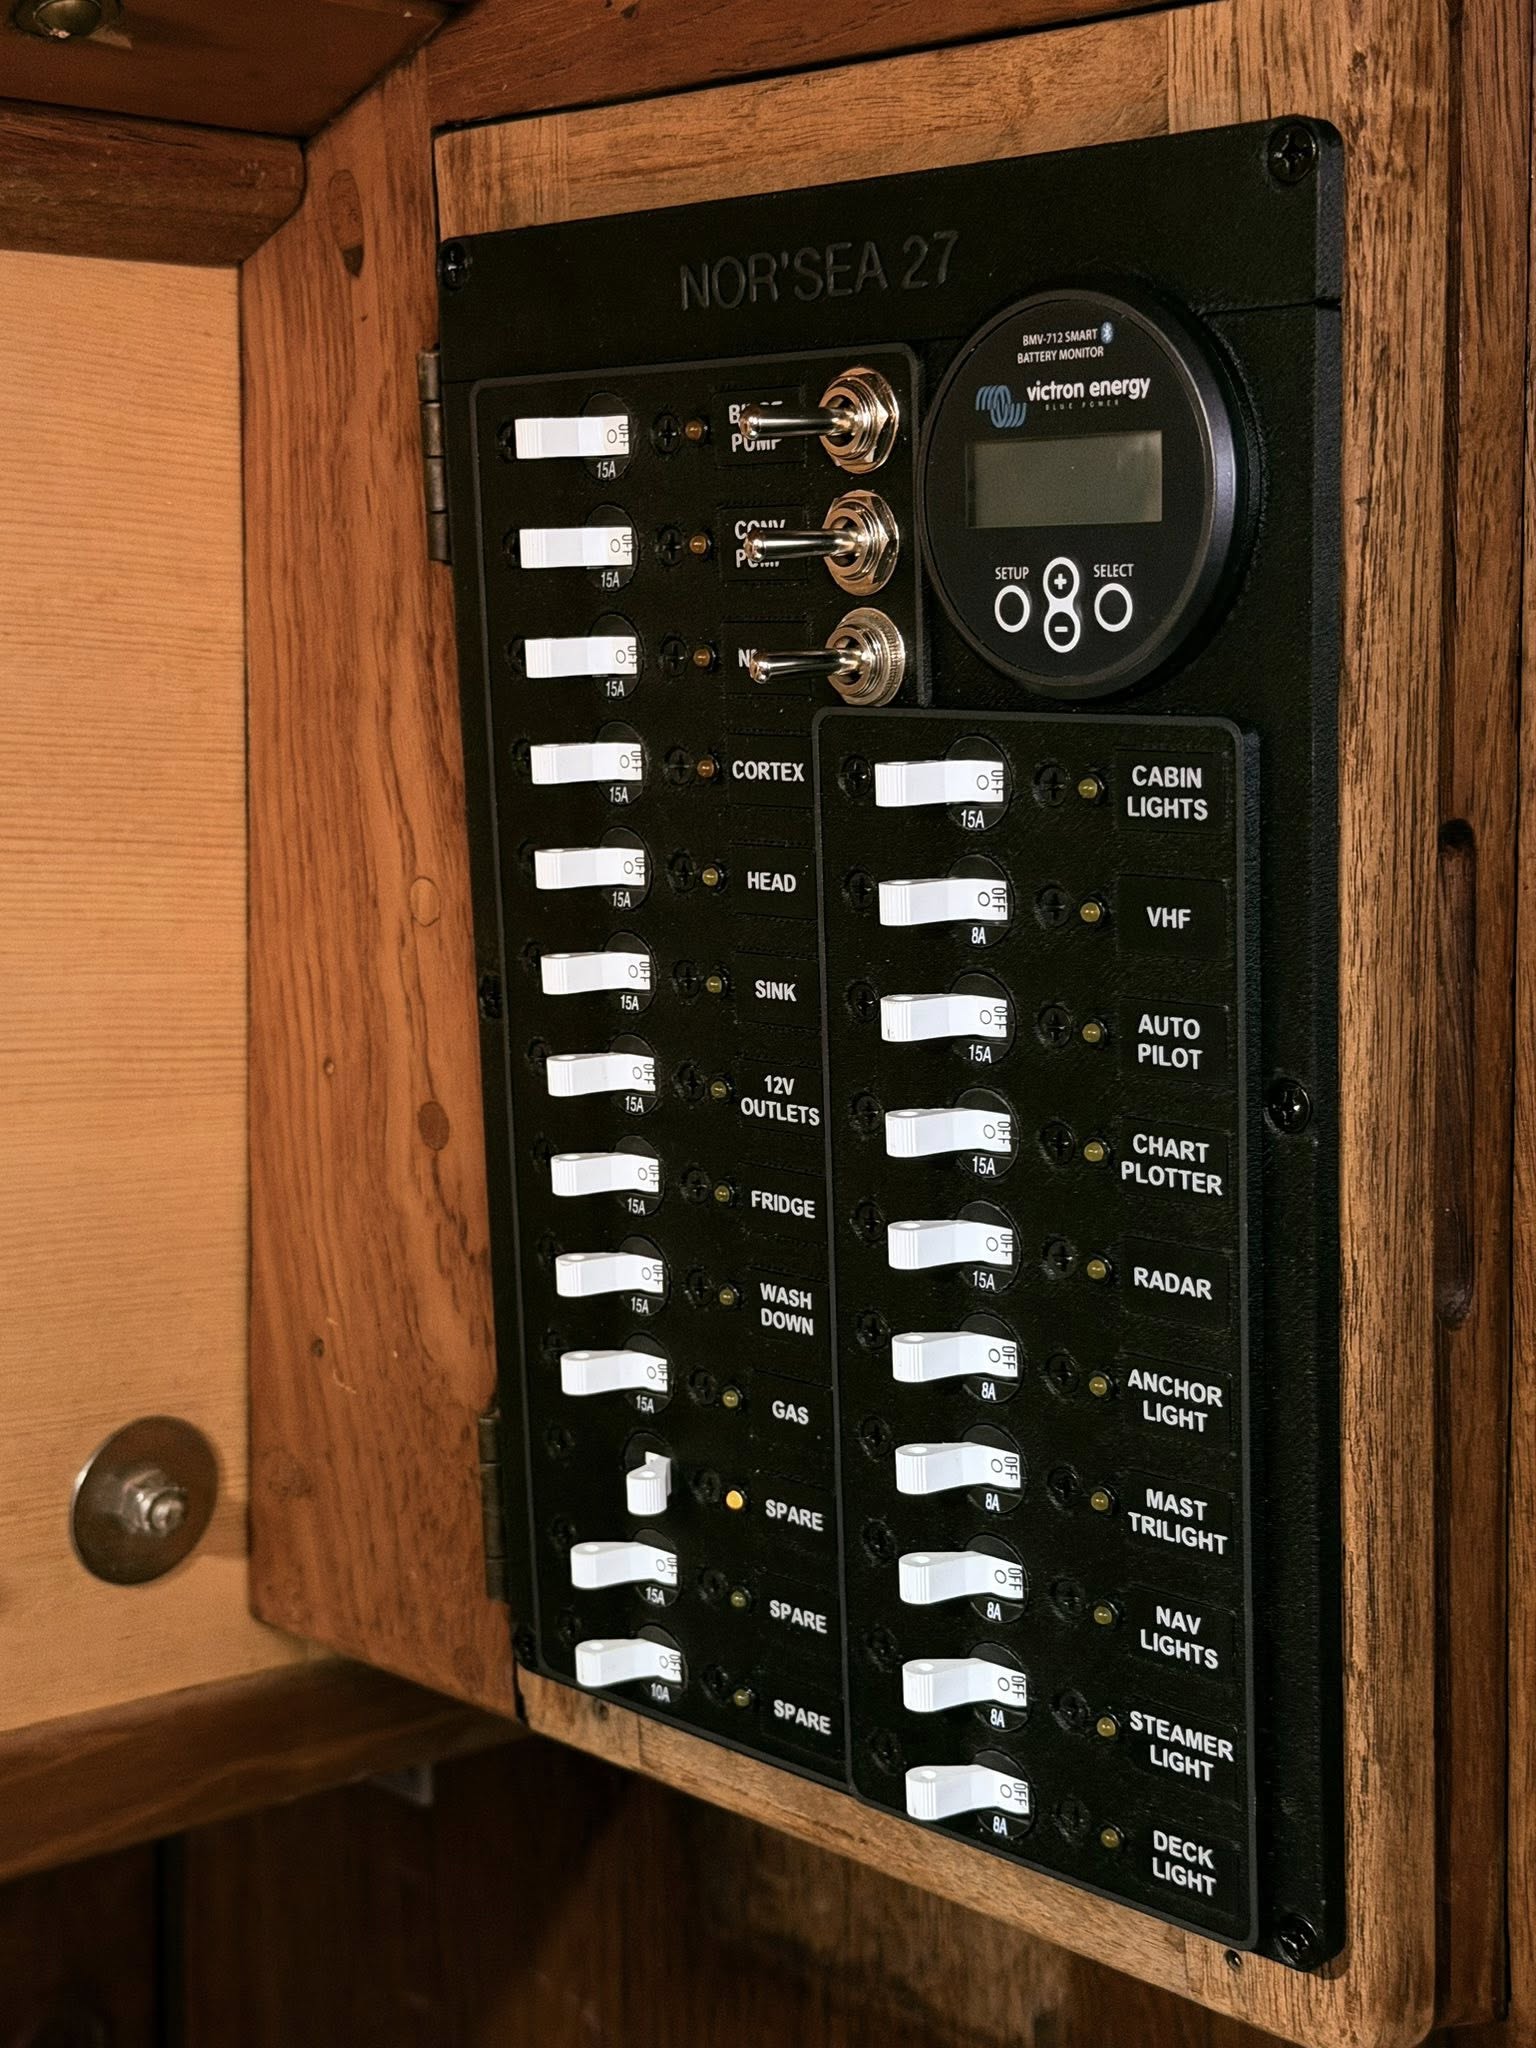
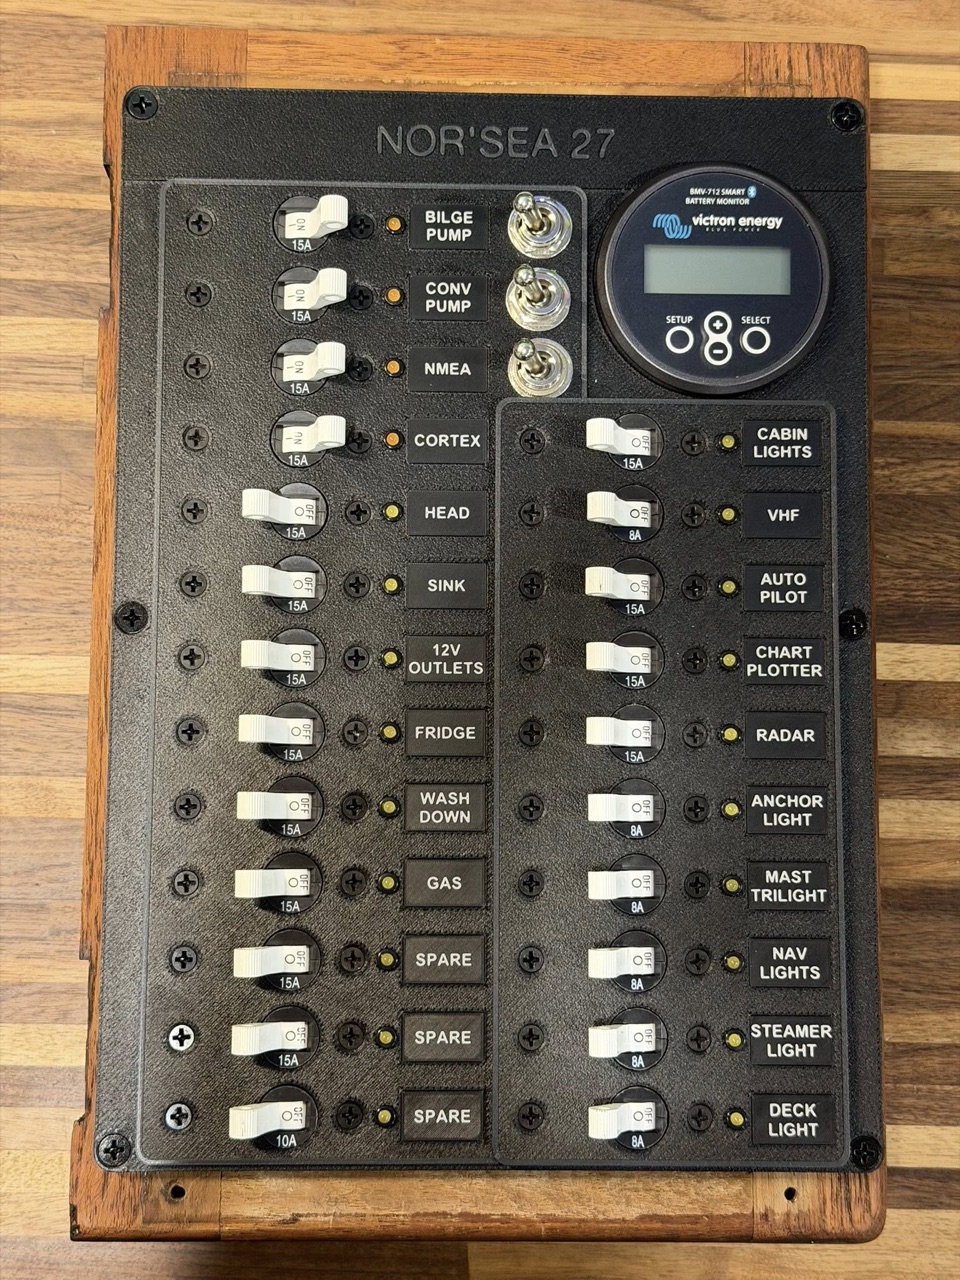
The panel is sized to fit the existing cabinet near the companionway and houses 23 Blue Sea Systems A-Series circuit breakers, three 12mm toggle switches for manual overrides and accessory control, and a Victron Energy Smart Battery Monitor BMV-712. The BMV mounts in a round cutout on the upper right, keeping it prominent and easy to read at a glance.
The design is split into two pieces to fit within the printer's build volume. The two halves join seamlessly when mounted, and the split is hidden behind the installed breakers.
Components
| Main panel | 3D-printed PETG-CF, two pieces |
|---|---|
| Circuit breakers | Blue Sea Systems A-Series, 23 positions |
| Toggle switches | 3× standard 12mm toggles |
| Battery monitor | Victron Energy Smart BMV-712 |
| Circuit labels | Snap-in, printed in PETG with 0.2mm nozzle |
| Panel material | PETG-CF (carbon fiber filled), 0.6mm nozzle |
PETG-CF was chosen for the main panel for its stiffness and resistance to moisture and UV, important in a marine cabin that sees humidity, sun through ports, and the occasional splash. The labels are printed separately in standard PETG using a finer nozzle for legible lettering, then pressed into recessed slots in the panel face.
Assembly and Install
Fully populated panel on the bench before installation.
Breakers screw into the panel face and the labels press into their recessed slots without adhesive, making it straightforward to relabel or swap a breaker position in the future. The Victron BMV-712 installs into its round cutout and is wired to the shunt on the house bank, giving a live readout of voltage, current, and state of charge.

Wiring on the back of the installed panel inside the cabinet.
MakerWorld Files
The panel design files are available on MakerWorld. Sized for the Nor'Sea 27 cabinet opening, but the design could be adapted for similar spaces.
Results
Having everything on a single panel is a significant quality-of-life upgrade. Every circuit is labeled, every breaker is in one place, and the BMV-712 is always visible when stepping below. The panel fits the existing cabinet with slight modifications to the door.